
Gathering Your Tools for Textural Art
TL;DR
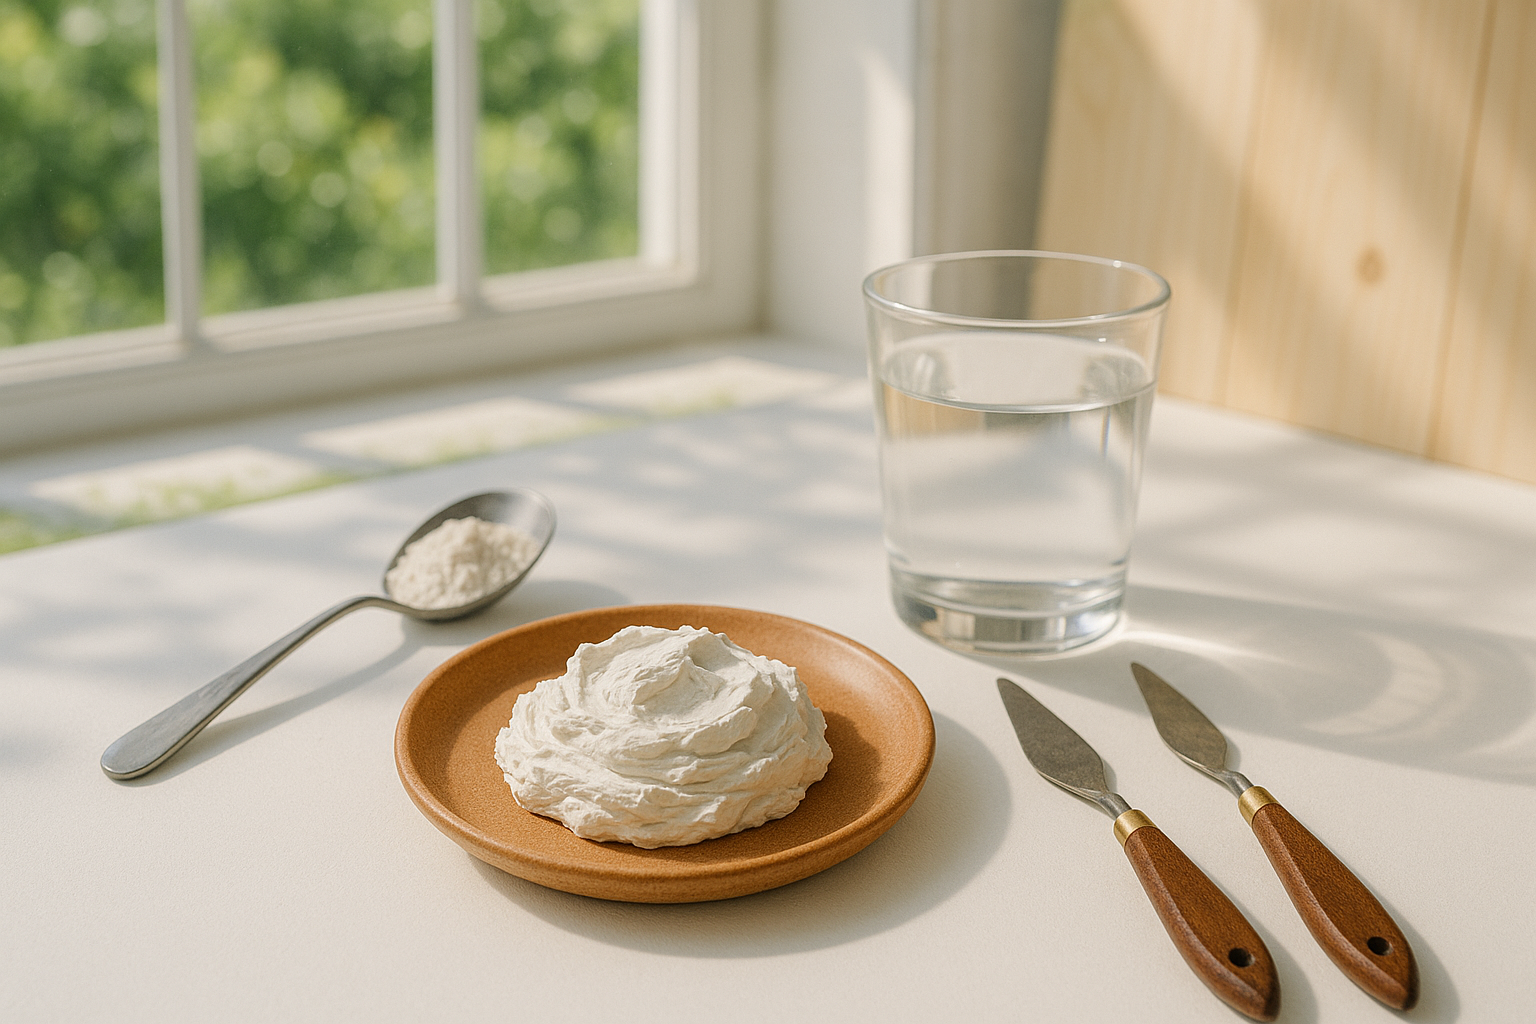
Palette Knives
Plaster
Joint Compound
Water
Now that you’ve chosen your art surface (if you missed that, check out the previous post), it’s time to gather the tools you’ll need to start crafting your textural art.
Typically, I’d sketch my design onto my surface before pulling everything together, but since we’re still in the gathering supplies phase, let’s make sure you’re fully equipped before we start mixing and sculpting.
Palette Knives
First up—palette knives. These are the long, cylinder-handled tools with dull metal blades that come in different shapes and sizes. They’re not sharp like kitchen knives; instead, they’re made for stirring and applying your medium onto your surface.
You’ll find both plastic and metal versions, but I personally use metal palette knives. They’re more flexible and can handle the pressure needed when mixing thicker compounds without snapping. Plus, they’re easy to clean and last forever.
In my Amazon list, you’ll find a few options—my go-to is the #1 knife, which has a shorter blade perfect for applying your medium. The #2 knife works great for stirring. Once you get comfortable with them, you’ll find they’re like an extension of your hand—essential for shaping and blending texture.
Plaster
Next up: good old Plaster of Paris. You can find it at any art supply store or home improvement store (but not in my Amazon list this time).
Plaster is a dry powder that turns into a moldable, creamy compound when mixed with water. It sets quickly—usually within 10 to 15 minutes—and once dry, it can be sanded, primed, and painted. It’s amazing for sculpting dimensional layers.
However, plaster on its own is brittle. It needs a partner that adds a little flexibility so your piece doesn’t crack as it cures. That’s where the next tool comes in.
Joint Compound
Joint compound—the same material used to seal drywall seams or patch cracks—also happens to be a textural artist’s best friend. You can grab it at any hardware store, or find it linked in my supply list.
Artists love it because it bonds beautifully to wood and canvas and plays well with other mediums. When combined with plaster, it slows down the overall drying time. The plaster makes your mixture set quickly, but the joint compound keeps it workable a bit longer.
That balance gives you more control—you’ll notice it stiffens as it dries, but still has a slight give for sculpting fine details.
A hard-earned lesson: don’t sand it right after it “feels” dry. Let it sit for a full day first. That patience pays off—your surface will be much smoother and more stable when you sand.
(I’ll share my exact plaster-to-joint-compound ratio in a future post—it’s a total game-changer.)
Water
Last but definitely not least: water.
Water does more than just help with cleanup. It thins your compound if it gets too thick and acts as a gentle lubricant between your fingers and the surface. That slip allows you to shape, blend, or thin out areas without the compound sticking to your hands.
Sometimes you’ll want to smooth a ridge, adjust an angle, or add mass to a section—and water helps you do all of that seamlessly. Keep a small cup nearby at all times.
Curiosity and Grit
These might not be physical tools, but they’re just as important.
If you’ve made it this far, you already have the curiosity—that spark that got you here in the first place. Now you just need grit. Because when you’re trying something new, there’s always a gap between what you imagine and what you create.
The more you experiment—layer by layer, piece by piece—the more that gap closes. Keep showing up for the process. You’ll surprise yourself with what your hands are capable of.
And if you have questions about tools, techniques, or mixing ratios, I’d love to help. Just reach out through my contact form and I’ll do my best to answer—maybe even in a future blog post.